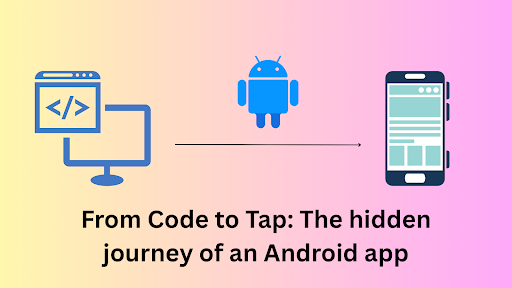
When we think of an Android app, we usually imagine the colorful icons and screens we interact with. But behind the scenes, there’s a fascinating and complex journey that transforms a developer’s code into a running application on your phone. This process involves compilers, build tools, package managers, the Android operating system itself, and finally the actual hardware running your device. Let’s dive deep into this journey step by step.
1. Writing the Code
The journey begins with developers writing code in Java or Kotlin for the app’s logic, and XML for the UI layouts. These files are just plain text, human-readable and editable in IDEs like Android Studio. Developers also configure Gradle build scripts, define dependencies, and structure the project with modules. At this stage, nothing is executable yet it’s all instructions waiting to be transformed.
2. Resource Processing
Beyond code, an Android app has resources: XML layouts, images, strings, and styles. Tools like AAPT2 (Android Asset Packaging Tool 2) process these resources, generating IDs in the R class so developers can access them programmatically.
3. Compilation to Bytecode
Here’s where the transformation begins:
- Java/Kotlin → .class files
- Java code is compiled by javac.
- Kotlin code is compiled by kotlinc.
Both produce .class files containing Java bytecode, a platform-independent representation of instructions for the Java Virtual Machine (JVM).
- What is a .class file?
A .class file holds bytecode: compact, standardized instructions like aload_0, invokevirtual, etc. Bytecode is not tied to a CPU architecture; it’s meant to run anywhere with a JVM. - Why compile to bytecode first?
Because Java/Kotlin were originally designed to be cross-platform, this intermediate step allows tools like Android’s compilers to further process the code into a mobile-optimized format. - D8 – The Dex Compiler
Android devices don’t run .class files directly. Instead, the D8 compiler takes all .class files and transforms them into .dex files (Dalvik Executables).- .dex files are optimized for the Dalvik/ART (Android Runtime).
- They merge multiple .class files into fewer, more compact .dex files.
- D8 also applies desugaring (turning newer Java/Kotlin features like lambdas, streams, coroutines into bytecode compatible with Android).
- .dex files are optimized for the Dalvik/ART (Android Runtime).
👉 In short:
					Java/Kotlin Source Code (.java / .kt)
             │
             ▼
   javac / kotlinc compiler
             │
             ▼
   Java Bytecode (.class files)
             │
             ▼
             D8
     (Dex Compiler)
             │
             ▼
   Dalvik Executable (.dex files)
4. Optimization (R8/ProGuard)
Next, tools like R8 (or ProGuard, in older projects) shrink and optimize the code. They:
- Remove unused classes and methods.
- Obfuscate names to make reverse engineering harder.
- Optimize instructions for performance.
This step reduces the APK size and increases efficiency, which is critical for memory-limited mobile devices.
5. Packaging into an APK
Now everything comes together. The build system packages:
- The .dex files
- Compiled and binary resources
- Native libraries (if any)
- The AndroidManifest.xml file (describes app metadata like permissions, activities, services)
The result is the APK (Android Package) file, a compressed archive that contains everything needed to install the app. Think of it as a neatly packed box containing all parts of the app.
Purpose: Packaging ensures that the app is self-contained, portable, and ready to be distributed either through app stores (like Google Play) or direct downloads.
6. Signing & Alignment
Before Android allows an app to be installed, it must be digitally signed:
- Purpose of Signing: Signing guarantees the app’s authenticity and integrity. It proves that the APK truly comes from the developer who owns the signing key and has not been modified by anyone else. Android also uses signing to enforce update continuity; an app can only be updated if the new APK is signed with the same key as the installed version.
- Signing Process:
- The developer (or build system) uses a private key stored in a secure keystore.
- A cryptographic signature is generated based on the APK’s contents.
- This signature is embedded into the APK along with the developer’s public certificate.
- During installation, Android verifies the signature by checking the certificate against the app’s data. If any file was tampered with after signing, the verification fails and installation is blocked.
- ZipAlign: After signing, the APK is optimized with a tool called ZipAlign. This aligns all uncompressed data inside the APK on 4-byte boundaries, which makes resource loading more efficient by allowing Android to directly map files into memory without extra copying.
Together, signing and alignment make the APK both secure and efficient for distribution and execution.
7. Installing the App
When a user installs the app, the Package Manager plays a central role:
- Package Manager: A core Android system service that handles all app-related operations such as installation, updates, and removal. It ensures apps are secure, uniquely identified, and properly registered with the system.
- Signature Verification: The Package Manager verifies that the APK has been signed with a valid certificate. If the certificate doesn’t match (e.g., if someone tampered with the APK), installation is blocked.
- Metadata Extraction: It reads the AndroidManifest.xml to understand the app’s structure, its package name, permissions, declared components (activities, services, receivers), and intent filters.
- Registration: The app is registered in the system’s internal database, which allows the launcher to display the app icon and other apps to interact with it via Intents.
- File Placement: The APK and its resources are copied into a protected directory (/data/app/), accessible only to that app. Each app also gets a unique Linux UID and sandboxed storage space, ensuring isolation from other apps.
At this point, the app is officially installed, secure, and visible in the app drawer but it’s still dormant until launched.
8. ART Optimization (dexopt)
Once the app is installed, Android prepares it to run more efficiently by performing ART (Android Runtime) optimization. This step bridges the gap between portable bytecode and fast native execution:
- dexopt: The process that takes .dex bytecode and generates optimized machine code. The results are stored as .oat (Optimized ART) or .odex (Optimized DEX) files in the device’s storage.
- Ahead-of-Time (AOT) compilation: Converts frequently used methods into native instructions before the app runs, improving startup speed and runtime performance.
- Just-in-Time (JIT) compilation: Compiles methods dynamically while the app is running, which saves storage space and allows flexibility but may have a small runtime cost.
- Profile-Guided Compilation (PGC): A hybrid approach that monitors user behavior. For example, if you always open the same screen first, ART will AOT-compile that code while leaving rarely used paths to JIT.
This ensures that your apps feel snappy while balancing storage size, memory efficiency, and battery usage.
9. Launching the App
When the user finally taps the app icon, Android performs several orchestrated steps:
- Zygote Process: A special system process already preloaded with core libraries. Instead of starting from scratch, Android quickly forks Zygote to create a new app process, saving time and memory.
- Application Class: If the developer has defined a custom Application class, this is created and initialized. It’s the entry point for setting up global state, dependency injection frameworks (e.g., Hilt/Dagger), crash reporting, or analytics.
- Launcher Activity: Defined in AndroidManifest.xml with an <intent-filter> for MAIN and LAUNCHER. This is the screen the user first sees. The Activity lifecycle begins, calling onCreate(), inflating the UI, and attaching resources.
In short, this stage transforms the app from dormant files into a live, running process ready to display its UI..
10. User Sees the UI
At this stage, the app’s visual interface finally comes to life:
- The Activity’s layout XML is inflated into a tree of Views (buttons, text, images, etc.).
- The View Hierarchy is measured and laid out to determine size and position.
- The Android Render Thread and GPU pipeline take over, converting these Views into actual pixels drawn on the screen.
- Touch handlers, click listeners, and gestures are attached, allowing the app to respond to the user.
What was once just text written by a developer has now fully transformed into a living, interactive experience.
Final Thoughts
Imagine this journey as a story. A developer sits in front of a keyboard, typing ideas into code. That code then goes through a long adventure compilation, optimization, packaging, installation almost like a traveler passing through checkpoints, transforming along the way. Finally, it arrives at its destination: your phone’s screen. When you tap the app’s icon, you’re not just opening a program, you’re waking up a process that has traveled a vast distance, through languages, runtimes, and system services, all to serve you instantly.
The next time you tap an app on your phone, remember: behind that single tap lies a remarkable story of collaboration between human creativity, software tools, operating systems, and the tiny but powerful computer in your hand.


