What Are Keys in Flutter?
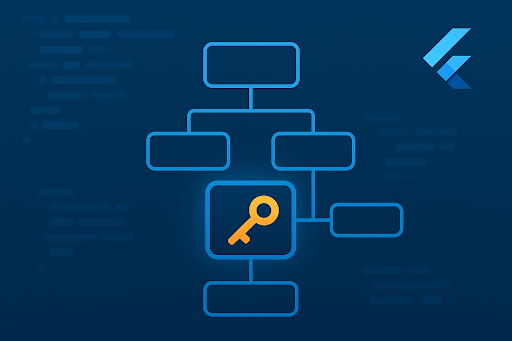
In Flutter, keys play a crucial role in identifying widgets uniquely within the widget tree. They come in handy when widgets are moved, updated, or need to retain their state. One of the most common use cases for keys is maintaining the scroll position in scrollable widgets or preserving the state of a widget even if its position in the widget tree changes.
Flutter offers different types of keys, which are mainly categorized into two groups:
1. Local Keys: These are used within the same widget subtree and include:
- ObjectKey
- ValueKey
- UniqueKey
- PageStorageKey
2. Global Keys: These are more powerful and can be used across the entire widget tree:
- GlobalKey
Using the right key at the right time can make your UI more efficient and stable, especially when widgets are reused or rebuilt frequently.
When to use keys?
In Flutter, keys aren’t something you need every day—but when the situation calls for them, they’re essential.
Keys come into play in specific scenarios—like when you’re adding, removing, or reordering widgets that share the same type but hold their own state. Without keys, Flutter can get confused about which widget is which during rebuilds, and that can lead to unexpected behavior, like state being lost or applied to the wrong widget.
They’re especially crucial for preserving the state of individual widgets when your UI is going through changes, whether that’s from a hot reload, a tab switch, or during transitions and animations. Think of keys as unique IDs that help Flutter keep track of which widget is which, even as the widget tree changes.
Lets deep dive
					class StateTest extends StatefulWidget {
 const StateTest({super.key});

 @override
 State<StateTest> createState() => _StateTestState();
}

class _StateTestState extends State<StateTest> {
 final _data = [
   StateLessNumber(),
   StateLessNumber(),
 ];

 @override
 Widget build(BuildContext context) {
   return Scaffold(
     body: Center(
       child: Column(
         mainAxisAlignment: MainAxisAlignment.center,
         crossAxisAlignment: CrossAxisAlignment.center,
         children: _data,
       ),
     ),
     floatingActionButton: FloatingActionButton(
       // swap btn
       child: const Icon(Icons.swap_horiz),
       onPressed: () {
         setState(() {
           // swap position
           final temp = _data[0];
           _data[0] = _data[1];
           _data[1] = temp;
         });
       },
     ),
   );
 }
}
In this Flutter code example, we are rendering two stateless widgets called StateLessNumber. Each widget displays a randomly generated number. When we run the app and press the “Swap” button, the numbers appear to swap as expected in the UI, even though we haven’t used any keys.

So we usually don’t need to worry about keys with stateless widgets, but they can still be beneficial—especially when the widget is part of a list that is being reordered.
					/// If the widgets have no key (their key is null), then they are considered a
/// match if they have the same type, even if their children are completely
/// different.
static bool canUpdate(Widget oldWidget, Widget newWidget) {
 return oldWidget.runtimeType == newWidget.runtimeType
     && oldWidget.key == newWidget.key;
}
WHY? In Flutter’s rendering mechanism, when a widget doesn’t have a key, Flutter compares widgets based only on their runtime type. If the runtime type stays the same, Flutter tries to reuse the existing widget and updates it as needed. However, if the runtime type changes, Flutter discards the old widget and creates a new one from scratch.
					final _data = [
 const StateFullNumber(),
 const StateFullNumber(),
];
					class StateFullNumber extends StatefulWidget {
 const StateFullNumber({super.key});

 @override
 State<StateFullNumber> createState() => _StateFullNumberState();
}

class _StateFullNumberState extends State<StateFullNumber> {
 late final int _number;

 @override
 void initState() {
   super.initState();
   _number = Random().nextInt(50);
 }

 @override
 Widget build(BuildContext context) {
   return Text('Number: $_number');
 }
}
Now, let’s change the widget from a StatelessWidget to a StatefulWidget, while keeping the same functionality. The only difference is that the initial random number is now stored in a state variable. If we run the app and press the swap button, we’ll notice that nothing changes on screen.

What’s Going On Here?
The reason behind this behavior is the same as before. Let’s quickly recap how Flutter’s rendering mechanism works. When you provide a key to a widget, Flutter compares both the keys and the runtime types during the re-rendering process. In this case, when Flutter compares the old widget with the new one, it finds them to be the same because no keys are provided, and the runtime types are identical. As a result, Flutter attempts to update the existing widget. Since the number data is stored in the state object and not in the widget itself, no changes are reflected in the UI.
This is why keys are so important. They help Flutter differentiate between widgets, allowing it to correctly identify which widget is being swapped. With the key in place, Flutter knows it’s not the same widget and can correctly look up the previous widget and its associated state. However, the type of the key matters as well, using the correct key type is essential for Flutter to function properly.
					final _data = [
 const StateFullNumber(key: ValueKey(1)),
 const StateFullNumber(key: ValueKey(1)),
];
Now, if we simply add a ValueKey to the key property, we should see the number swap as expected. By doing this, we’re explicitly telling Flutter that the new widget is not the same as the previous one. This allows Flutter to look for the previous widget in the same position within the widget tree. When it finds a match, it updates the render object reference to the new widget, and this change is reflected in the UI.
Let’s see some interesting things.
					final _data = [
 const Padding(
   padding: EdgeInsets.all(8.0),
   child: StateFullNumber(key: ValueKey(1)),
 ),
 const Padding(
   padding: EdgeInsets.all(8.0),
   child: StateFullNumber(key: ValueKey(1)),
 ),
];
Now, keeping the same functionality and code, let’s wrap the StatefulNumber widget with a Padding widget. We’re still assigning keys to the StatefulNumber widget. When we run the app and press the swap button, we’ll notice that a new random number is generated every time.
Now why does this happen?
Flutter’s element-to-widget matching algorithm works one level of the widget tree at a time. In our example, the top-level widgets (in this case Padding) have the same runtime type, so Flutter reuses them and updates them as needed. Then, moving one level deeper to the StatefulNumber widget, Flutter compares the keys.
Since we’re swapping the widgets, the keys are different at this level. And because we’re using a local key (like ValueKey), Flutter looks for a widget with the matching key at that same level in the tree. When it doesn’t find a match, it concludes that the widget has changed entirely. As a result, it discards the old widget, creates a new one, and initializes a fresh state.
That’s why we see a new random number every time we swap the widgets.
Picking the Right Key for the Job
When working with an ordering widget like the number swapping example, we only need to differentiate between the keys of the other child widgets.
In a to-do list app, the text of each to-do item is usually unique and doesn’t change. In this case, using a ValueKey with the to-do item’s text as the value is a good choice.
					return ReorderableListView(
 onReorder: (oldIndex, newIndex) {
   setState(() {
     if (newIndex > oldIndex) newIndex -= 1;
     final item = todos.removeAt(oldIndex);
     todos.insert(newIndex, item);
   });
 },
 children: todos
     .map((todo) => ListTile(
   key: ValueKey(todo), // Using to-d- text as the unique ValueKey
   title: Text(todo),
 ))
     .toList(),
);
In a more complex scenario, like an address book with fields such as first name, last name, and birthday, any individual field might be the same as another entry. However, the combination of these fields is unique for each person. In this case, using an ObjectKey is probably the best choice.
This way, the entire object (e.g., the person’s full data) can serve as the unique identifier, ensuring proper handling even when individual fields repeat.
					return ReorderableListView(
 onReorder: (oldIndex, newIndex) {
   setState(() {
     if (newIndex > oldIndex) newIndex -= 1;
     final item = contacts.removeAt(oldIndex);
     contacts.insert(newIndex, item);
   });
 },
 children: contacts
     .map((contact) => ListTile(
   key: ObjectKey(contact), // Using the full contact object as the unique key
   title: Text('${contact.firstName} ${contact.lastName}'),
   subtitle: Text(contact.birthday),
 ))
     .toList(),
);
If we want to guarantee that each widget is completely distinct from all others, we can use the UniqueKey. This key is automatically generated and ensures that no two widgets are ever treated the same, even if their data is identical. It provides a truly unique identifier for each widget, making it ideal for scenarios where complete separation between widgets is necessary.
Page storage keys are specialized keys that help preserve the user’s scroll position, allowing the app to restore it later. For example, if you have two tabs, and in the first tab, you scroll down to a certain point, then switch to the second tab, and later come back to the first tab, the app can remember and show the exact same scroll position you were at before switching tabs. In this case, PageStorageKey is the perfect solution to achieve this functionality.
					TabBarView(
 controller: _tabController,
 children: [
   // Tab 1
   ListView.builder(
     key: const PageStorageKey<String>('tab1'), // Storing scroll position for Tab 1
     itemCount: 100,
     itemBuilder: (context, index) {
       return ListTile(
         title: Text('Item #$index'),
       );
     },
   ),
   // Tab 2
   ListView.builder(
     key: const PageStorageKey<String>('tab2'), // Storing scroll position for Tab 2
     itemCount: 100,
     itemBuilder: (context, index) {
       return ListTile(
         title: Text('Item #$index'),
       );
     },
   ),
 ],
),
Global keys have two uses. They allow widgets to change parents anywhere in our app without losing the state. Or they can access information about another widget in a completely different part of the widget tree. They are little like the global variables.
Wrapping Up
In summary, use keys when you want to preserve the state across widget trees. This is most commonly needed when you are working with a collection of widgets of the same type, such as in a list.
Here’s how you can approach it:
- Place the key at the top of the widget tree you want to preserve. This ensures that the state of the widget (e.g., scroll position, form data) is maintained even when the widget is rebuilt or moved.
- Choose the appropriate key type based on the type of data you are storing in the widget. For example, use:
- ValueKey for simple, unique data like a string or number.
- ObjectKey for objects with multiple fields (e.g., a contact or a product).
- UniqueKey when you want to ensure each widget is treated as completely distinct.
- PageStorageKey for saving scroll positions or other states across page transitions.
By selecting the right key and positioning it properly in the widget tree, you can ensure that Flutter correctly preserves and identifies your widget’s state during updates.


